Customizing the default Video/Audio Transition in Adobe Premiere Pro is much easier than any other video editing softwares. Customizing transition in Adobe Premiere is otherwise said to be known as
A/B Mode Fine-tune Transition. In this tutorial we are going to learn how to customize a transition in Adobe Premiere Pro CC [No need to worry if you don't have this version, you can try this out from any CS version].
Step 1
At first
create a new project and sequence in Adobe Premiere Pro.
Step 2
Import the footage and add a transition on it.
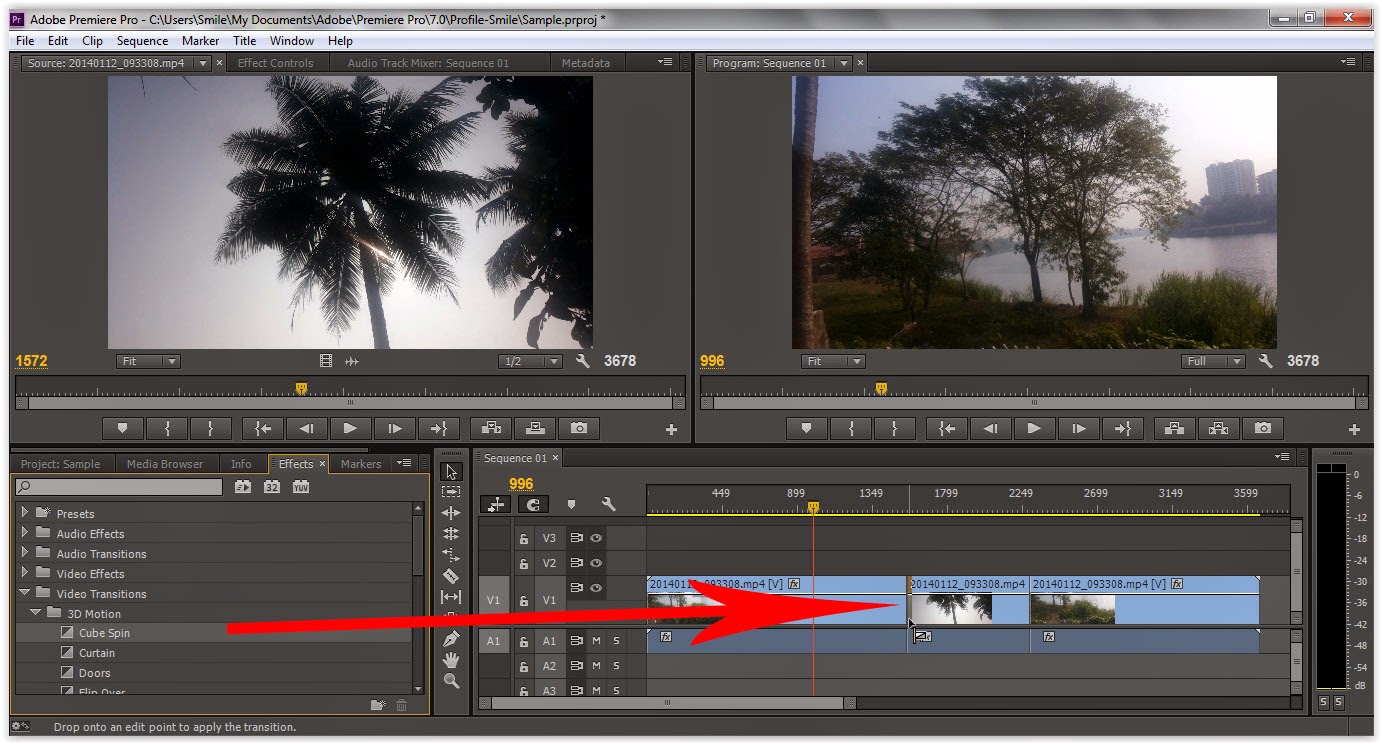 |
| Add a transition to video |
Step 3
Click on Effect Controls on the top of Source Monitor.
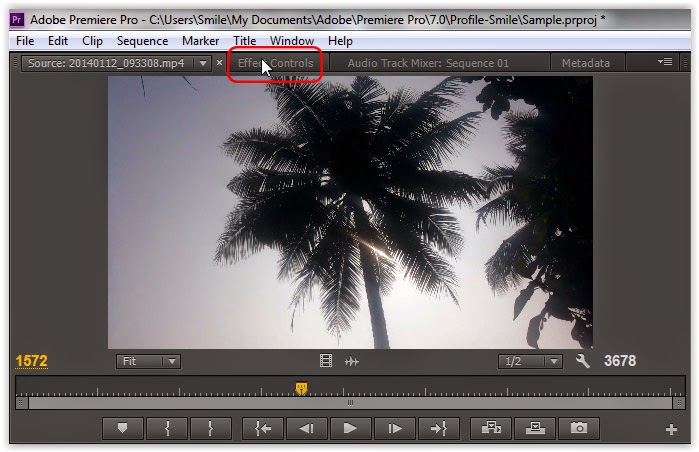 |
| Choose Effect Controls |
Step 3
Now select the transition you've added to the video.
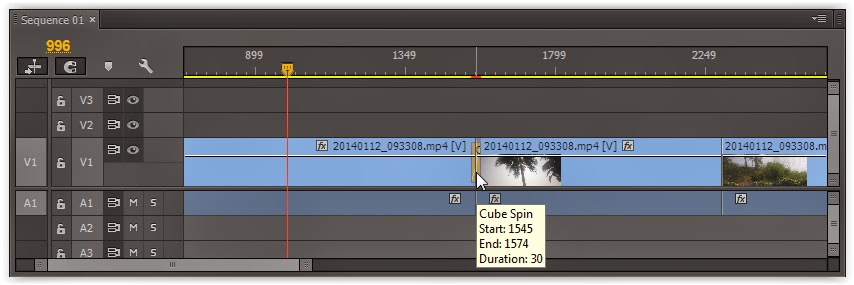 |
| Select the transition |
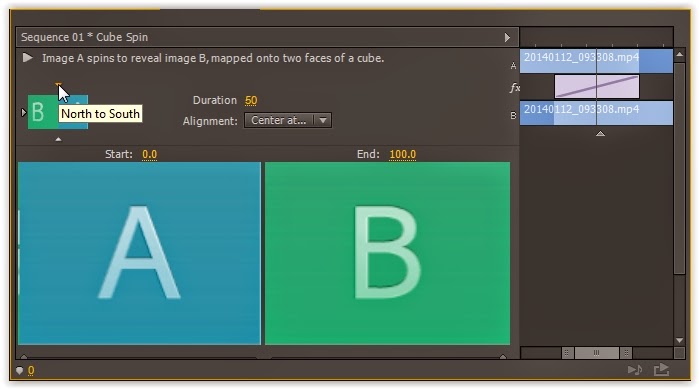
You'll get a window like this.
It is possible to change the direction, timing and alignment of a transition. Let's go to each of them one by one.
Step 4
You'll be able to see 4 small triangles around a small rectangular box on right side top in the Effect Controls Panel as shown in the figure. Clicking on them will change the direction of a transition either to North, South, East and West.
 |
| You can change direction by clicking on triangles |
Step 5
Next one is duration. You can change the duration of transition by specifying the seconds in number. Alternatively, you'll be able to see changes in transition on the video track.
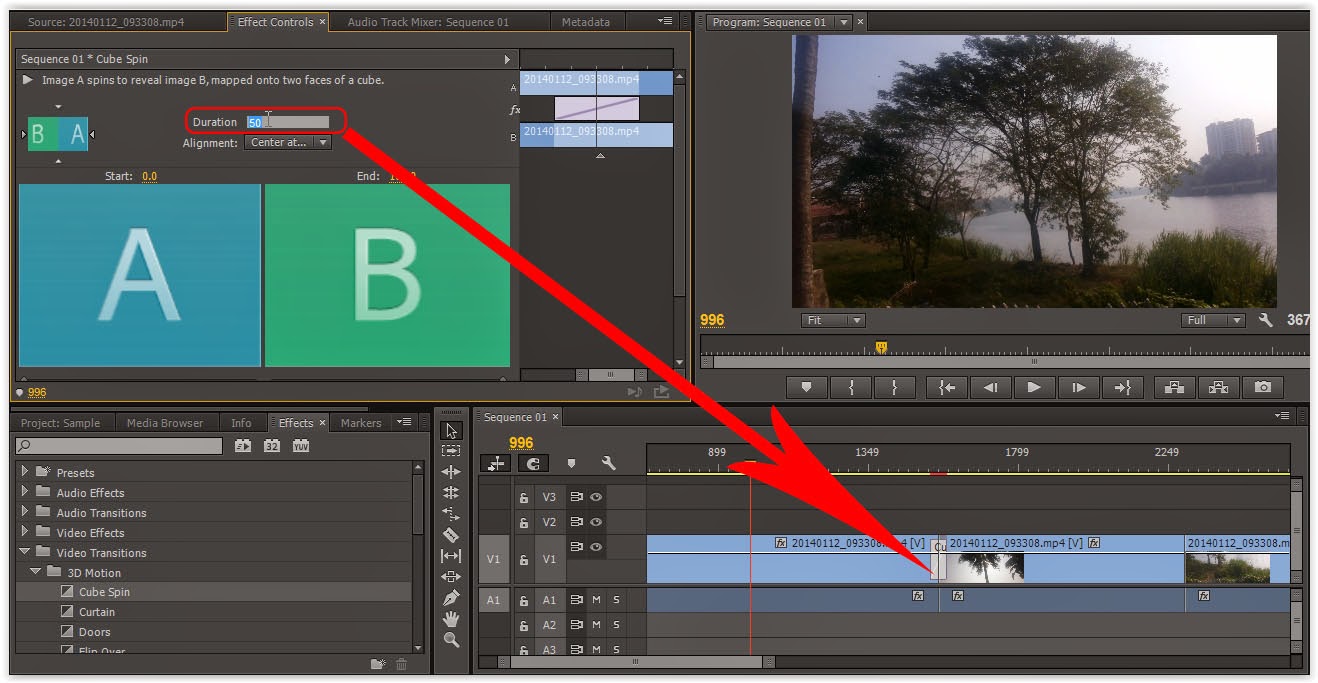 |
| You change duration by changing the number |
Step 6
By choosing one of the Alignment you can set the alignment of transition to Center at Cut, Start at Cut or End at Cut.
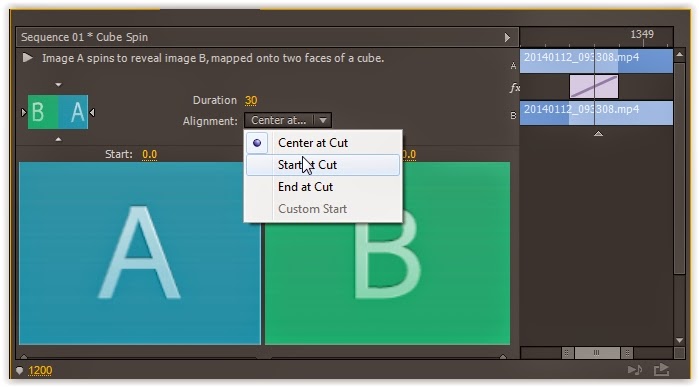 |
| Choose alignment |
Step 7
Next we can set the duration of start time of A clip and end time of B clip by changing the number of seconds above the A clip and B clip.
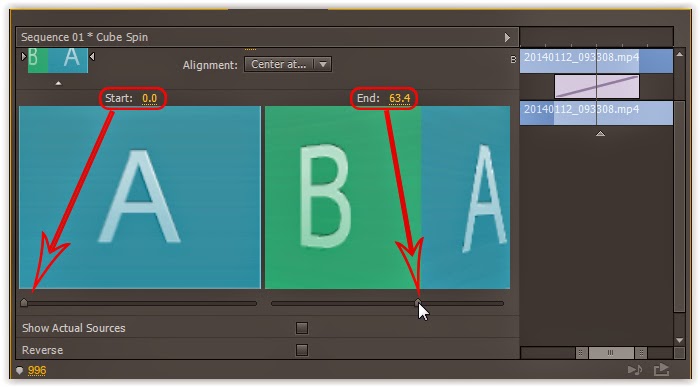 |
| Change the start time and end time |
Step 8
[Optional]
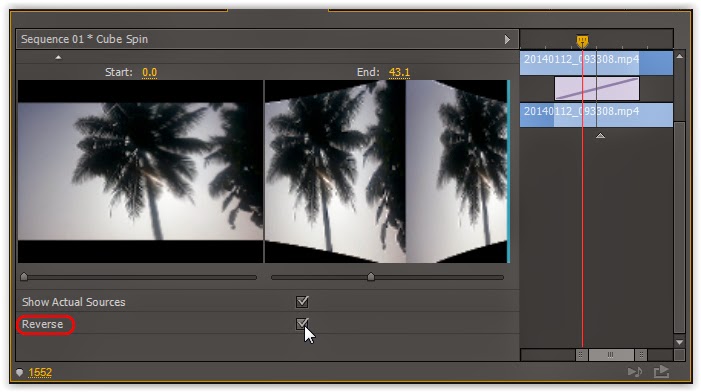
If we click on
Show Actual Sources, we could see clips instead of the image A and B.
 |
| Show Actual Sources |
Also, if we click on
Reverse, the direction of transition will be reversed.
 |
| Reverse |


No comments:
Post a Comment